How to send HTTP request when barcode scanned
The next simple guide is going to demonstrate how you can use a barcode scanner to send HTTP requests using an HTTP client. The page contains a step by step guide where you will be able to see, how to establish an HTTP client connection in Ozeki, and how you can make your camera a barcode scanner and send alert messages as HTTP requests.
Step 1 - Open Control Panel
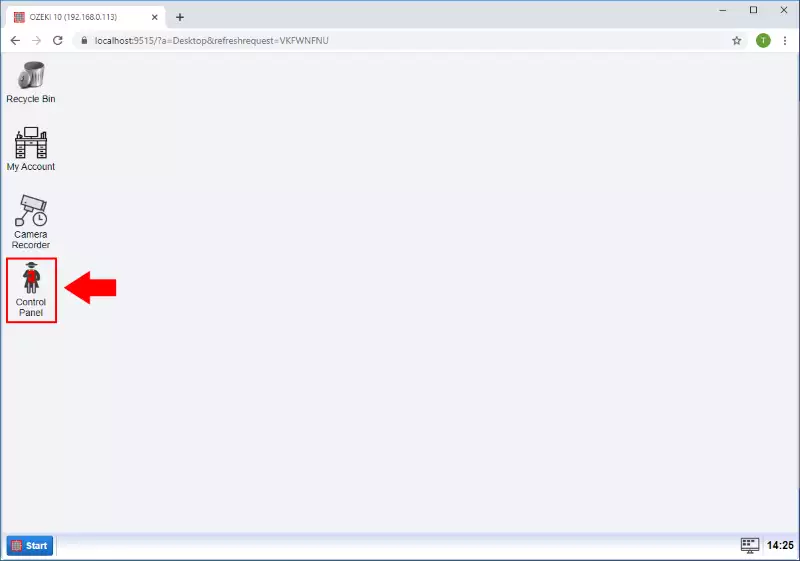
In the first step of this guide, you need to open the Control Panel. You can do this by opening Ozeki in your web browser, and on the Desktop, click on the icon of the Control Panel as you can see it in Figure 1.
Step 2 - Create new connection
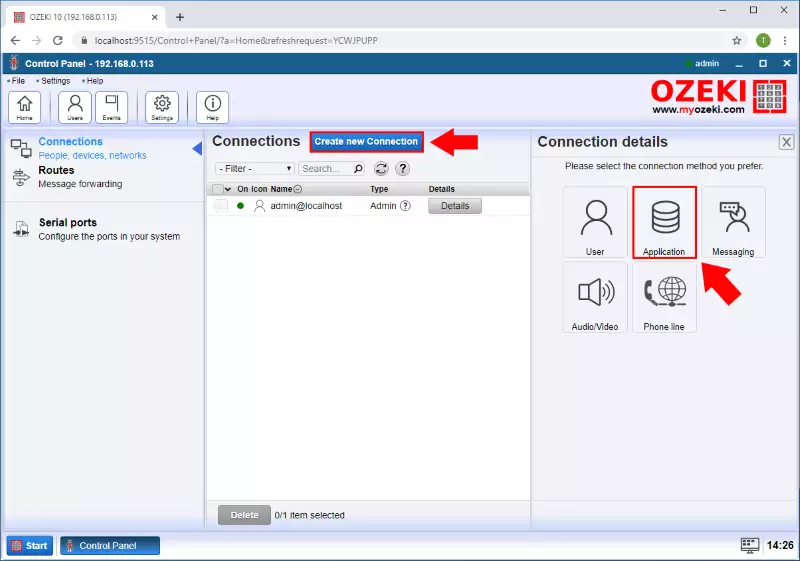
In the Control Panel application, you have to create an HTTP client connection to be able to send the alert messages via HTTP requests from the barcode scanner. To do that, first, click on the Create new Connection, and here, you need to select the Application option as Figure 2 shows it below.
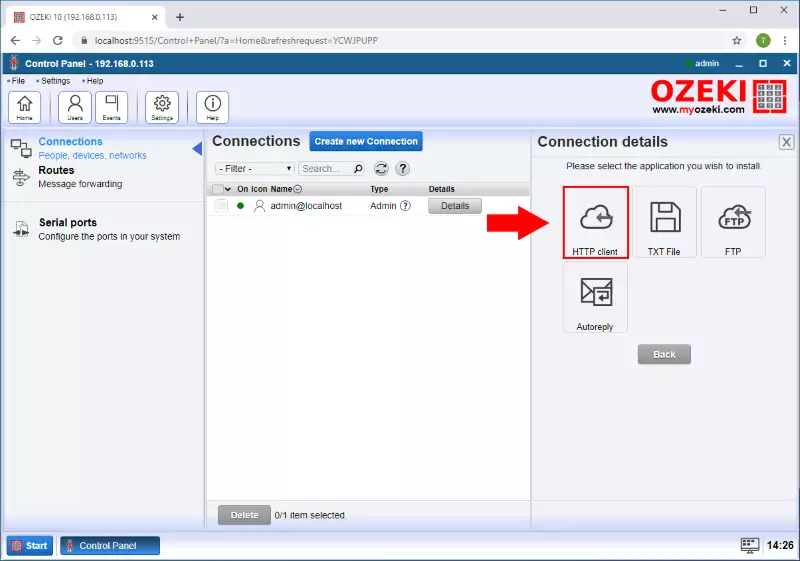
Next, you will be able to see the available Application connections in Ozeki. Here, you need to select the HTTP client just like in Figure 3, so just click on the icon of that connection.
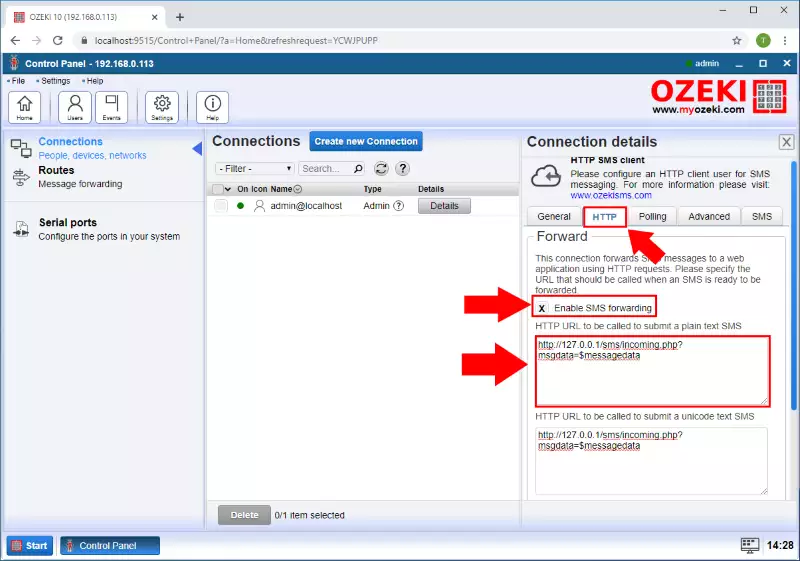
Before finalizing the HTTP client connection, you need to provide some details about what request will this connection send and what data the request will contain. First, you need to select the HTTP tab, and here, check the Enable SMS forwarding option. Then, you need to specify the request itself. Figure 4 shows a simple example of a request, which will send the message in the 'msgdata' parameter to the incoming.php script.
Step 3 - HTTP connection created
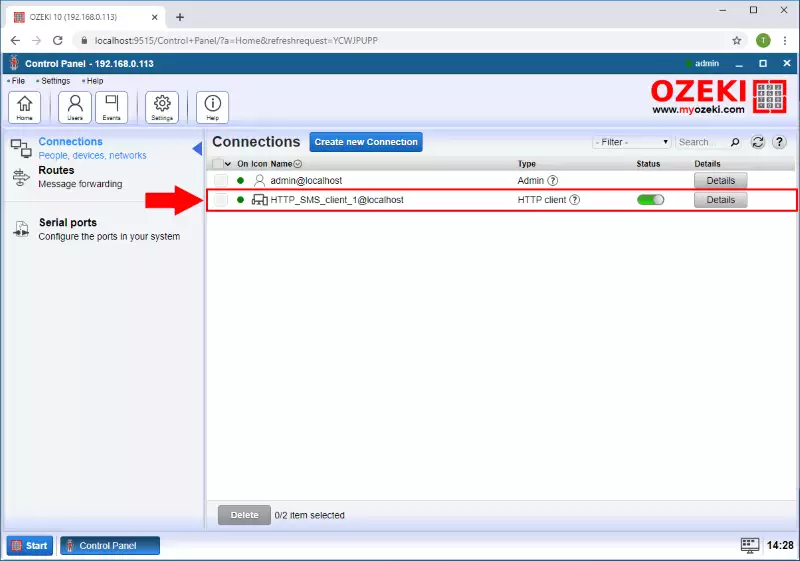
After you created the HTTP client connection, you will be able to see it in the list of available connections in the main menu of the Control Panel application as Figure 5 demonstrates it.
Step 4 - Example PHP code
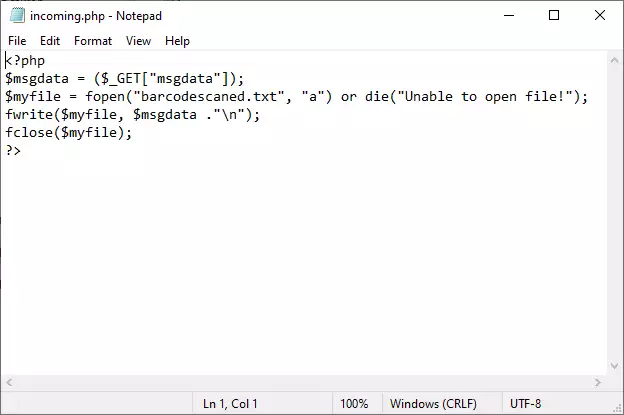
Next, you need to write a simple PHP script, that can handle the alert message from the HTTP request. Figure 6 shows a great example, that will store the message into a variable and then, it opens the 'barcodescanned.txt' text file and appends the alert message into that file.
Step 5 - Open Camera Recorder
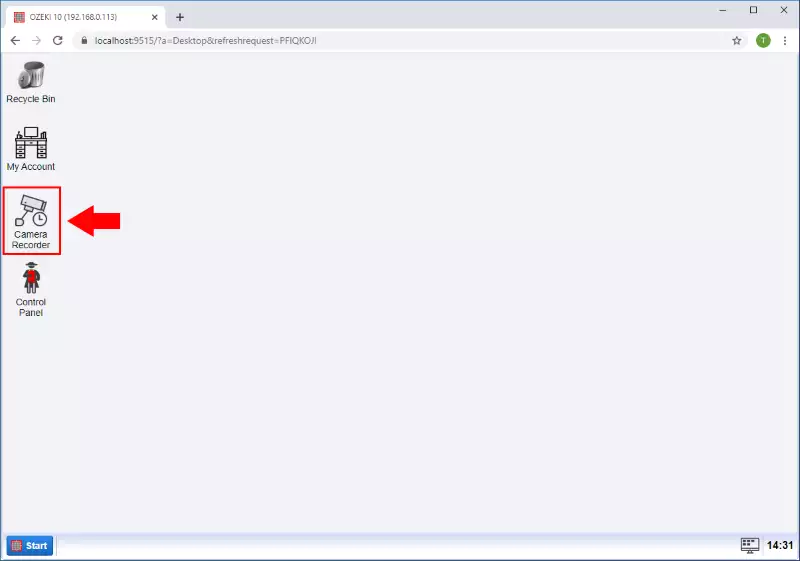
After you created the HTTP client connection and the PHP script, you need to establish the barcode scanner connection. To do that, just navigate back to the Ozeki Desktop, and here, just select the Camera Recorder application (Figure 7).
Step 6 - Create new camera connection
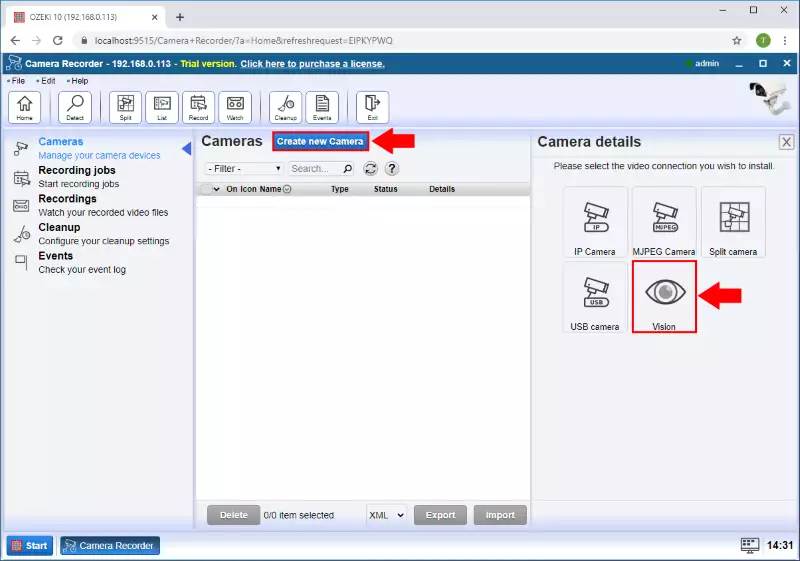
In the Camera Recorder application, to create the barcode scanner, first click on Create new Camera, and from the available options, select the Vision as Figure 8 demonstrates it.
Step 7 - Create barcode scanner
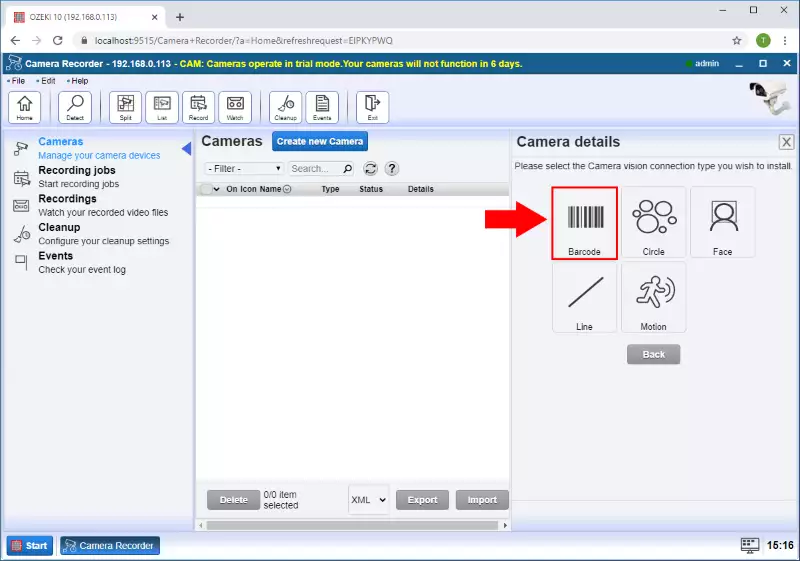
The Vision menu contains all the computer vision connections, that you can create in Camera Recorder. Now, this guide requires you to create a barcode scanner, so at this point, you have to click on Barcode (Figure 9).
Step 8 - Barcode scanner details
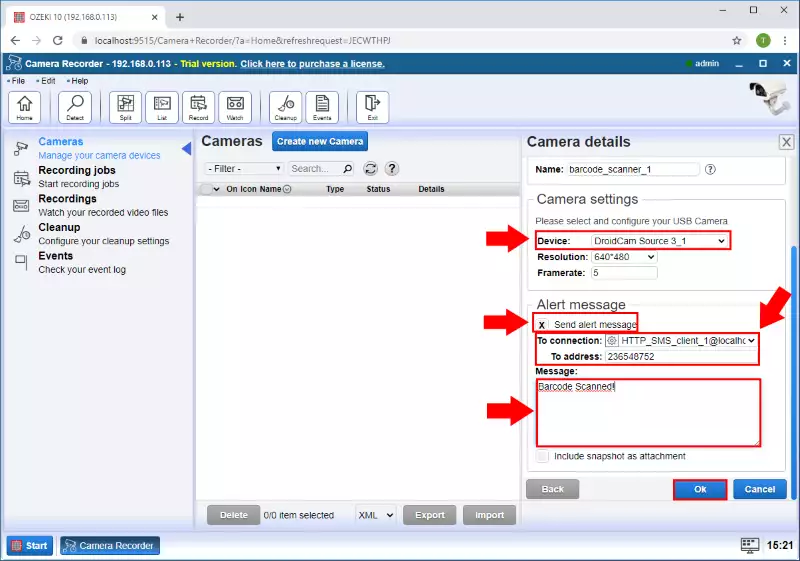
Next, you need to define the details for the barcode scanner. First, you need to select the camera, that you would like to use as a barcode scanner. Then, check the Send alert message option, and select the HTTP client connection that you created before. At this point, you need to type the phone number where you want to send the alert and type the message itself. Lastly, check the option that ensures that the barcode will be sent as well, as an attachment (Figure 10). Finally, just click on OK.
Step 9 - Barcode scanner created
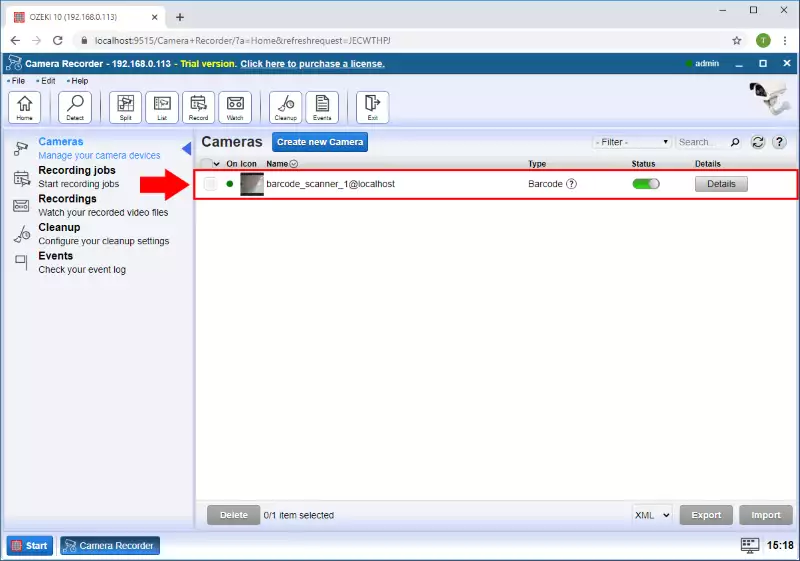
After you created the barcode scanner, it will appear in the list of the camera connection in the Camera Recorder applications. You can check it by selecting the Cameras menu of the Camera Recorder like in Figure 11.
Step 10 - Barcode scanned
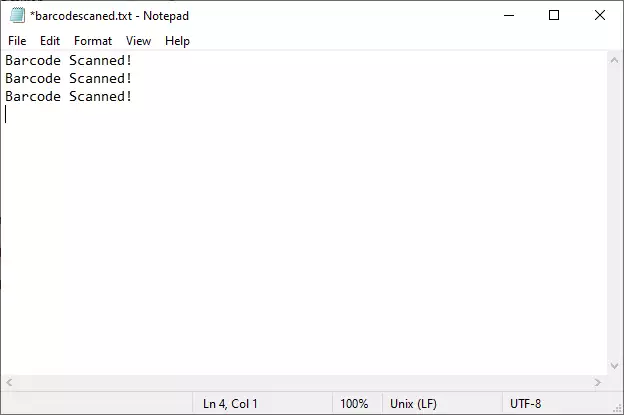
At this point, you can test your solution by scanning a barcode with your camera. If you have done successfully to this point, after you scanned a barcode, you will be able to see the alert message in the 'barcodescanned.txt' text file as you can see it in Figure 12.

 Sign in